
Bella Cloche
October 3, 2013
Ever since I read about the use of glass cloches in the agricultural
techniques of 16th century
Paris, I have been in love with the romance of using glass cloches in my own
vegetable garden. They are a perfect example of form following function with
their endearing bell shaped design; each leafy green is like a fair exhibit all
its own being practically protected from the frost to prolong the growing
season. It is the perfect solution for
the small time gardener. A lot of nutritious greens can be grown in just a few
square feet of space. I have been growing a small winter patch for many years,
always using some ugly tarp, or left over plastic scraps to do the job. However resourceful I pride myself on being;
these options are not so attractive. In fact, this was brought to my attention
one day by an honest child who said, “Mrs. Johnson, Why do you have garbage in
your garden?”
So, It has been my little Martha Stewart dream to own glass
cloches to improve the beauty and quality of life in my garden. Only one obstacle
has been barring my way, the fact that each of these lovely bells of glass
costs around $50. Well, when was the
last time I let money stop me from doing what I wanted? Oh yeah, never.
So, as my aforementioned resourcefulness implies, I found a
new way to recycle. I have been squirreling away glass jars of all types as
material supply for my growing home fermentation addiction and I finally ran
out of room for my jars. One of my favorite such vessels are the big jugs that organic
apple cider comes in at the store. You know the ones, with the little finger
handle at the top that holds a gallon of fermented goodness. Only thing is, I
had way too many of them and I could not bring myself to throw them in the
recycling bin because they are so special. Then I realized that these were my
Beautiful cloches just waiting to be re-imagined!
Using U-tube for the unlimited educational resource that it
is, I learned how to cut the bottoms off my jugs with a mere string and finger
nail polish! (I will not burden you with lengthy explanations of my craft steps
here as you are perfectly able to look up the videos yourself.) Being
homeschoolers, of course, we took this opportunity to get out of English class
and do some “art”. Oh how lovely my glass cloches have turned out. They even
have a lid so the bottles can vent hot air during the day and be closed again
at night. Yes, this fall, there will be no ugly tarp greenhouse here! Only
beautiful, up cycled juice bottle cloches for me.

November 2012 Peaches translated into winter joy.


 Time to thin the roots! Baby carrots make for good snacking. We put the baby beats in a stir fry and in salads.
 "But ask the animals, and they will teach you; the birds of the air, and they will tell you; ask the plants of the earth, and they will teach you; and the fish of the sea will declare to you. Who among all these does not know that the Lord has done this? In his hand is the life of every living thing and the breath of every human being."
Job 12:7-10
What's growing in May?
I still have not been brave enough to plant my tomatoes as it has been hailing and some more storms are expected, but the bed is dug and ready to plant any time. Everything is bigger, especially the plants that are under my little hoop houses.
"But ask the animals, and they will teach you; the birds of the air, and they will tell you; ask the plants of the earth, and they will teach you; and the fish of the sea will declare to you. Who among all these does not know that the Lord has done this? In his hand is the life of every living thing and the breath of every human being."
Job 12:7-10
What's growing in May?
I still have not been brave enough to plant my tomatoes as it has been hailing and some more storms are expected, but the bed is dug and ready to plant any time. Everything is bigger, especially the plants that are under my little hoop houses.


Ageing Your Dirt

Once I was invited to speak at a friend’s seed party about digging a garden. I tried to pass on what I had learned in John Jeavons’ book “How to Grow More Vegetables”. It is a lovely systematic way of creating a deep and fertile raised bed that gets better with time. As I looked out at my audience I noticed the grimaces on the ladies faces as they imagined the process of digging into their hard, dry Colorado clay a whole foot down and then loosening another foot beneath that. I think most of them decided to buy a tidy little box garden and fill it with expensive nursery dirt. I was saddened that I had not been able to get my point across about the slow, but rewarding process of improving one’s soil. I dug my garden beds the John Jeavons way and yes, it was a lot of work. When I first dug my garden I had some grass under which was rock hard, nasty red clay. For the first few years I religiously re dug my beds a foot deep with loosened soil laying another foot deep below that. I mixed in fresh compost and rounded their little tops before planting each spring; rotating my crops to maintain soil nutrients. It was all… very good exercise.

Today, as I was drinking my tea under the peach tree, breathing in wet spring air mixed with the scent of blooming lilacs, I got the urge to pull back the mulch from what is going to be my fava bean patch. It looked like a messy little hill covered with straw. As I lifted the straw, I found dark, sweet dirt underneath. As I pressed my fingers into the bed, they just sank right in! I had placed a small compost pile there last year so there was no need to mix in compost. A few pieces of straggly grass poked up around the edges. Those were soon dealt with, every dig of my trowel producing two or three healthy looking earth worms. This year I reaped my harvest. No digging required. I simply pushed my dry fava beans down into the soil and took another sip of tea. Smile. Wiggle toes. Breathe. Those are going to be some pretty tasty fava beans!
In case you didn’t get the hint, I strongly recommend the growing methods described by John Jeavons in his book “How To Grow More Vegetables (Than You Ever Thought Possible On Less Land Than You Can Imagine)”. He also has a very informative website at www.growbiointensive.org. His practices go beyond organic to sustainable gardening. I also have added one more idea onto what I have learned from him and heavily mulch all of my beds every winter. It cuts down on weeds and holds in the precious little moisture we get most winters in Colorado.

There is nothing like learning to care for your soil in the way a wine maker would care for a fine wine. Tending and loving it. Putting back into it from what it gave you, until one day you magically have the finest black, living loam that you have ever pushed your fingers through. It smells good enough to eat. This kind of dirt cannot be purchased at any garden store or spilled from any bag. It will feed you as well as you feed it and it is simply priceless.

MMMMMMMMMMMM! Compost, it smells like spring
March 7, 2012
COMPOSTER REVIEW
Last year my husband was helping a friend work on his new house. There was a compost bin in the back yard that had been left by the previous owner. They didn't want it so he brought it home for me. I have been making compost piles ever since I have been gardening, and I wondered how the bin would stack up to a regular pile. That was last summer. I have been filling that thing all fall and into the winter. Hubby moved it for me this spring and out of the bottom came a whole lot of great compost that is very much done. I filled a plastic garbage can with my finished compost. That is a lot more compost than I have ever found at the bottom of one of my piles before. It is a big, black, rubber bin. I think it keeps the compost warmer than it gets in a pile. It also forces the compost into a big, upright pile so that it doesn't shlump. Perhaps that keeps the center hot. Whatever it is, I am happy with the results.
Feb 29, 2012
Without meaning for it to begin, our garden is now under way. It just seems natural to wander outside and start digging when the weather is fair. I have dug up an area for hardy greens and put a hoop house over it. It was around 50 degrees today and it was quite warm when I stuck my hand under the tarp. I am hoping to see some baby spinach and kale soon! I also decided to plant sweet peas in the bean patch before it's warm enough for beans, so I built a trellace for them to climb on today. The soil is perfect. Still moist from the snow but not too muddy. I am keeping mulch on it to hold the moisture in. We'll see if we can get some peas to sprout under the straw.

April 13, 2012 Sweat Pea Update.
Look! They are growing! I can taste them already.

In July I planted carrots. They are now grown enough to start thinning them and eating some. Besides I want to get at them before winter just in case the cold kills them. This year I bought seeds for “Muscade Carrots”. We grew some in the spring also and my littlest son loved them. We found that the taste is nothing like the grocery store carrots at all! Grocery store carrots seem sweet and boring now. Even the other garden varieties we’ve grown have not been as tasty. Well, Texas started asking for more, so the patch I planted in July is mostly for him.

Last Summer we found one of these amazing caterpillars and took it to the nature center to learn about it. Today I found another one who posed for a photo opp. Minutes later a moth from the same species landed on the fence and I captured them both in a few minutes!
This is a Tobaco or Tomato Horn Worm
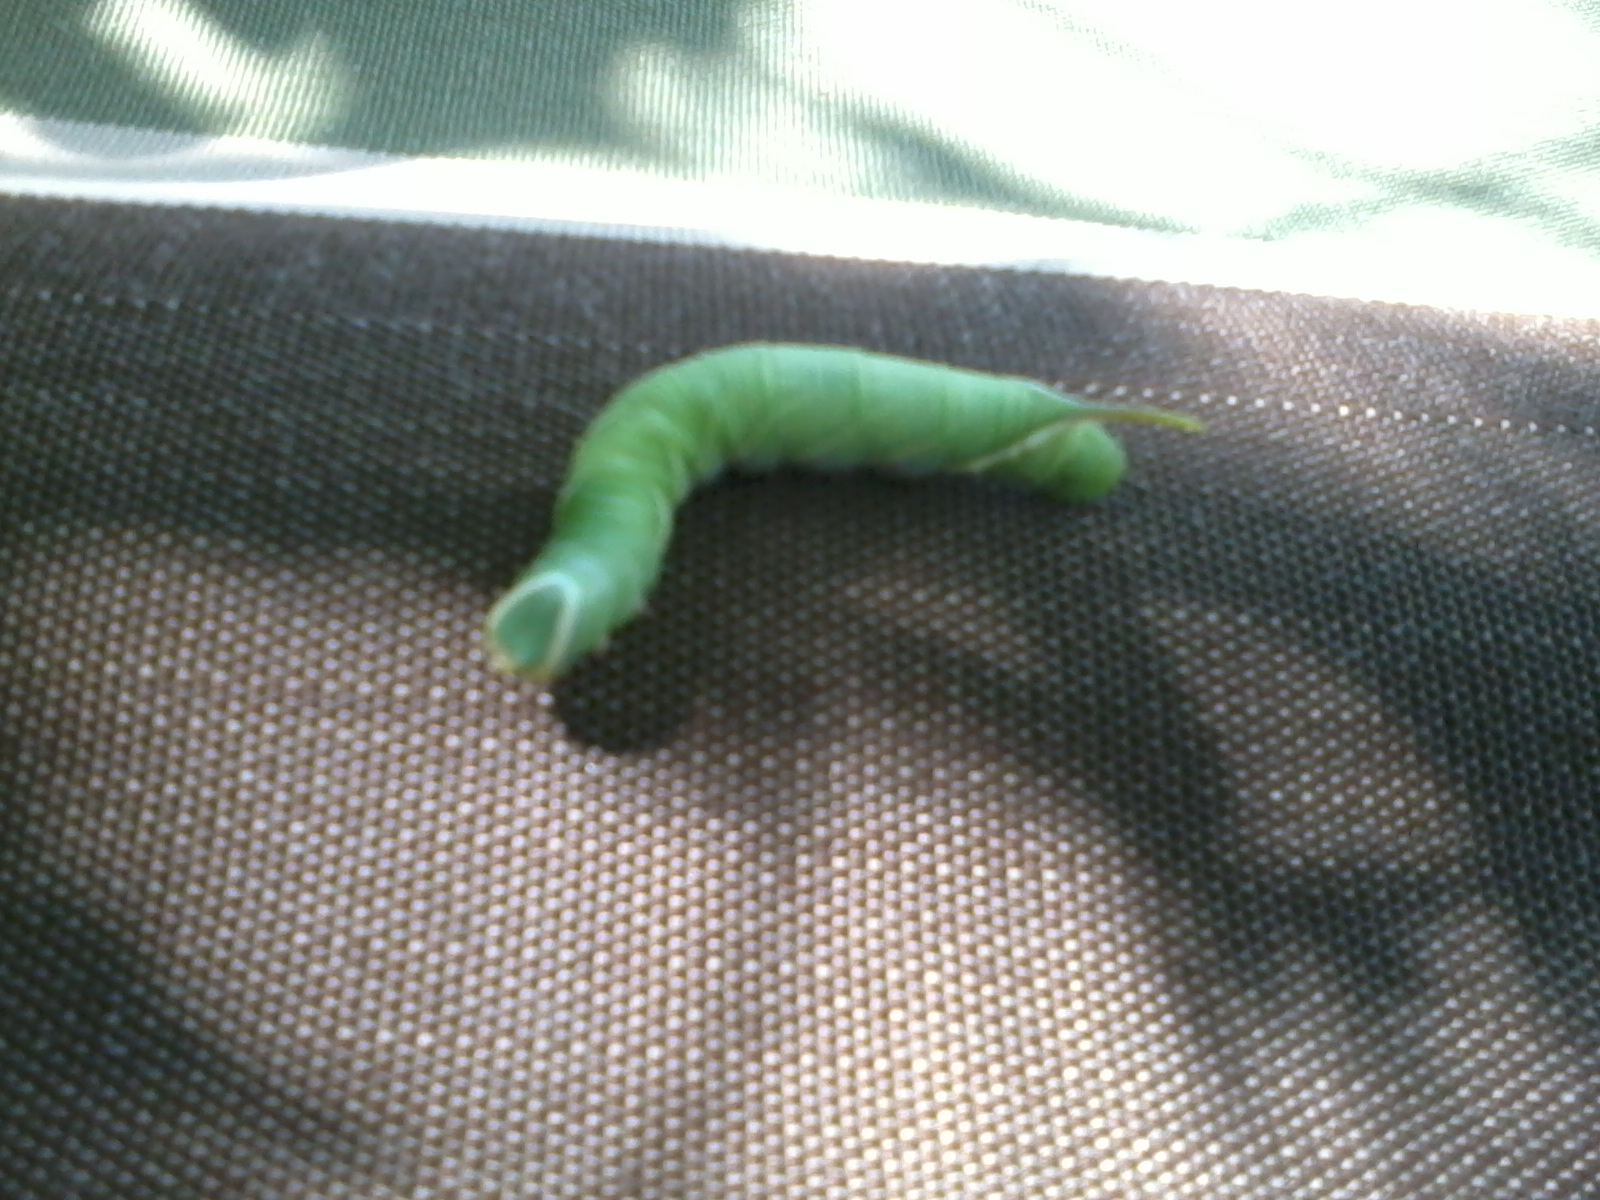

If you see either of these culprits, check your tomato plants for caterpillars and eggs and pick them off!

Some of the insects I am happy to see in my garden are bumble bees and butterflies. Bees have been declining in number in the past several years, so it is important to plant flowers they can visit to help them survive. And if you attract them with flowers, they'll be nice and pollinate your vegetable plants too. Letting Sunflowers grow in my garden patches seems to be a good way to atract them. Here is a picture of a Painted Lady Butterfly as well.

Every year I learn new things about gardening. This year I am learning a lot about sugar snap peas. Everyone in our family loves those sweet,tender delicacies. Problem is, they are expensive, and up until this summer I have never been able to grow them successfully. I start them early in the spring, like the package instructs, but it's too cold for the plants to get very big. Then summer hits, and they wither and dry out in the heat. I am lucky if I get a handfull of peas.
This year, I planted a whole patch of them, not just a row along a fence, like usual. When I planted the seeds, I also put in tomato cages so they'd have something to climb on. I think I planted in April, and they came up and looked pretty for a long time. They didn't start to flower until later in May. When it was time to weed for the first time, I saw some sunflowers coming up. They come up all over my yard every year and I pull them up where they are not wanted. I left them where they were.
